
Over time, the seals and connections in your vehicle's air conditioning system can allow a small amount of R-134a refrigerant to leak past and escape into the atmosphere. During cold weather in particular, the rubber seals shrink and provide a less secure seal. Adding R-134a refrigerant to replace the leaked refrigerant can be done at home by the average do-it-yourself mechanic for a fraction of the cost of paying an auto repair shop to perform the procedure.
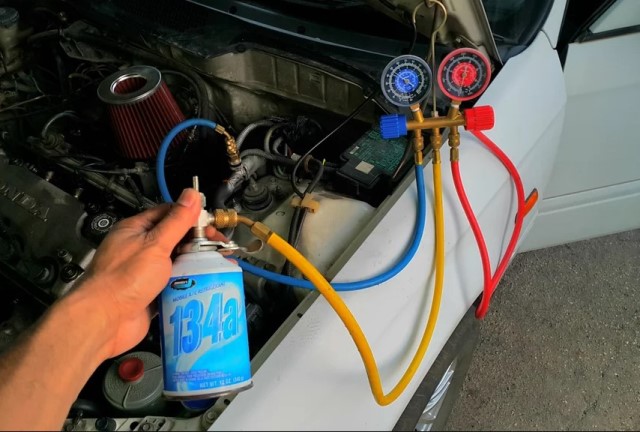
Step 1 - Attach the gauge set to the service ports located on the high-pressure and low-pressure aluminum a/c lines. These ports are found on the passenger side of the engine compartment in most cases. The blue hose of the gauge set is attached to the low-pressure port, and the red hose is attached to the high-pressure port. On vehicles equipped with R-134a refrigerant, these ports are a standard size and the hoses cannot be attached incorrectly.
Step 2 - Set the controls of the a/c system, located in the vehicle's dash, to provide maximum a/c, medium blower speed and recirculating air. Start the engine and allow it to run while you add refrigerant and observe the gauges.
Step 3 - Screw the can tap to the yellow hose on the gauge set and screw a can of refrigerant to the tap. Open the can using the thumbscrew on the tap. Open the blue low-pressure valve on the front of the gauge set to add refrigerant from the can.
Monitor the gauge readings by closing the valve every 30 seconds to observe the pressures displayed on the gauges. The system is full when the low-pressure gauge reads 35 psi +/- 5 psi, and the high-pressure gauge reads 350 psi +/- 50 psi.
THINGS YOU'LL NEED: A/C gauge set, Can tap
WARNINGS: Adding too much (overcharging) the a/c system can damage expensive components.


0 Comments